
Last year, TriRig.com showcased a Cervélo P3 with custom internal top tube cable routing. This modification sparked a lot of interest among thrifty aero-weenies like me. TriRig eventually posted a video with basic instructions. After psyching myself up for a couple days, I decided to give it a crack on my classic 2012 P2. Read on to see how I did it, including some minor improvements over TriRig’s method.
The classic Cervélo P2 (pre-2014) and P3 (pre-2013) are perhaps the two most storied and popular triathlon/TT bikes. Despite designs dating back nearly a decade, both bikes still trounce all but the top offerings from many other brands in wind tunnel tests. Nevertheless, some aspects of the P2 and P3 designs are looking a little long in the tooth. The latest crop of highly integrated triathlon/TT bikes, dubbed “superbikes”, almost all feature internal cable routing entering the top tube behind the stem. It is found on the second generation Cervélo P3. Behind-the-stem routing reduces frontal area, decreases drag and makes for a cleaner appearance.
Disclaimer: I cannot guarantee the safety of drilling holes in carbon frames, especially if you are “big boned”, your name is Fabian, or you are a bike molester. I am willing to put my trust in the fine engineers at Cervélo and the safety factor of
the frame design. Also, this project will definitely void your warranty (not a concern if your frame is second hand like mine). Finally, I’m no master craftsman, but this project does require a degree of wrenching competence. If you choose to undertake this project, you understand and assume all of the risks. Consider my ass covered!
the frame design. Also, this project will definitely void your warranty (not a concern if your frame is second hand like mine). Finally, I’m no master craftsman, but this project does require a degree of wrenching competence. If you choose to undertake this project, you understand and assume all of the risks. Consider my ass covered!
The steps I followed are described below. This isn’t meant to be a definitive how-to guide; I’m sure that my method can be refined.
Materials & Tools
- (2) Jagwire cable housing stops (part # CHA056) (I ordered 5 on eBay for a few bucks.)
- (2) nosed ferrules that fit inside the housing stops (I salvaged a couple from an old Shimano mountain bike cable set. These can also be found on eBay. Make sure you buy the correct diameter for your cables – more on that later.)
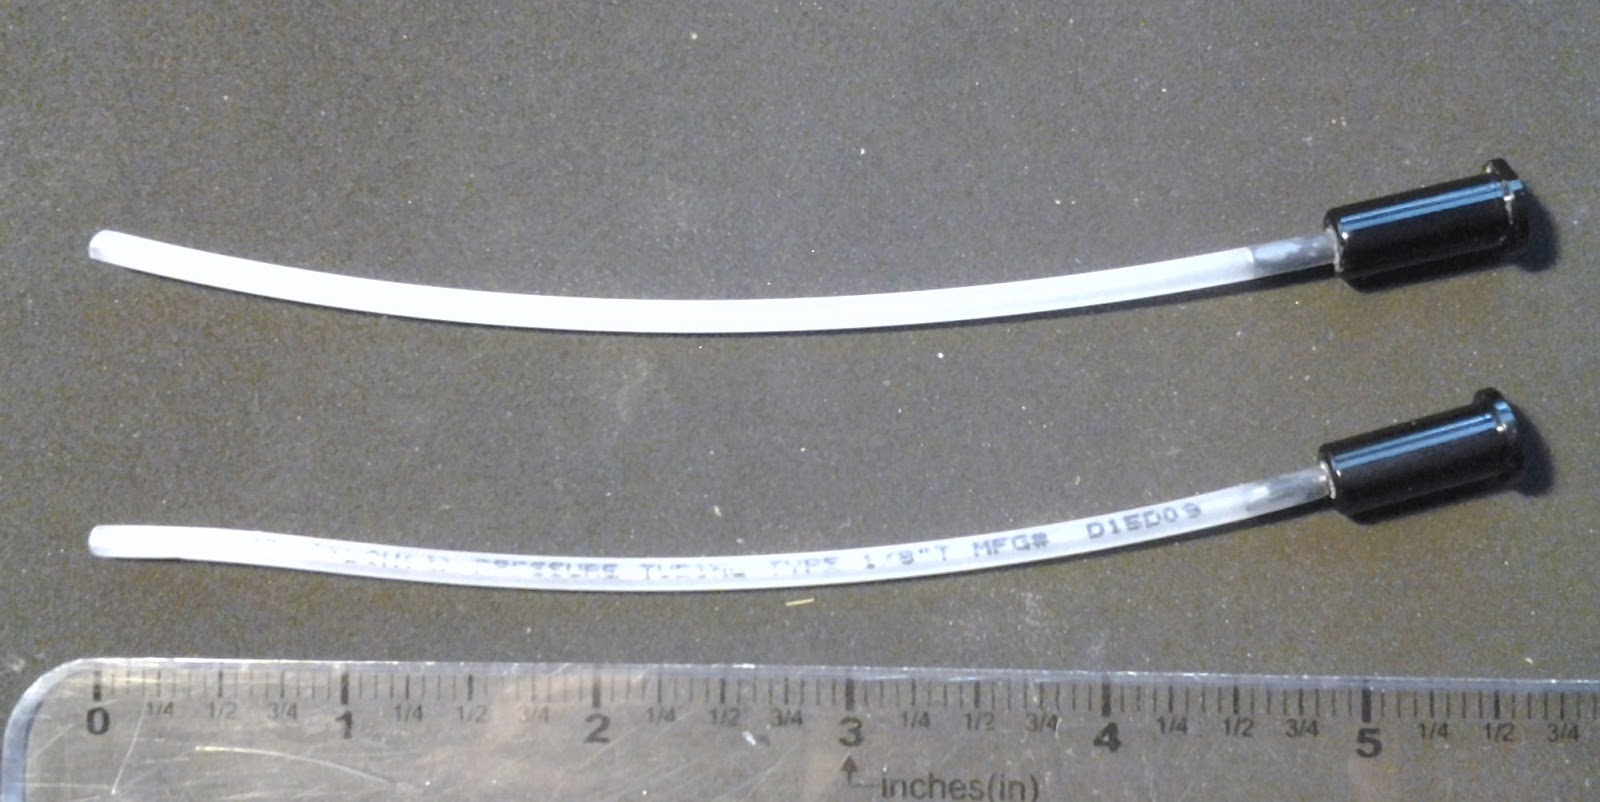
- 1/8″ nylon tubing (I used Nylaflow Low Pressure tubing.)
- PTFE/Teflon tape
- masking tape
- superglue
- drill and bits (tiny up to ~5/16”)
- cable cutters
- permanent marker
- box of tissues for the people whose dreams you will crush with your upgraded rig
 |
| Shimano nosed ferrule, Jagwire cable stop, 1/8″ nylon tubing |
1. Inspect the area.
I removed the fork and looked and felt around inside the head tube area. My 2012 54cm P2 didn’t have any obstructions in the path of the cables. Another concern was that the top tube/down tube junction would taper to a point that could kink the cable and accelerate deterioration of the cable guide. It turned out to be a fairly smooth bend with a radius similar to the exterior of the tubes. The carbon appeared to be relatively thick where the holes would be drilled.
2. Make the cable stops/guides.
First, a side note on cable housing: Shimano and SRAM shifter housing is ~4mm, while some other brands use ~5mm housing (e.g., some Jagwire, Nokon) (FYI: most brake cable housing is ~5mm). The Jagwire CHA056 stops have an inner diameter of 5mm, so ferrules are required for 4mm housing, and ferrules for 5mm housing won’t fit inside the stops. The method described here requires the use of nosed ferrules, therefore 5mm housing will not work. It is possible that a different combination of stops and ferrules would do the job.
The tip (or “nose”) of my Shimano ferrules didn’t quite fit through the hole in the stops, so I had to drill the holes out a little. The body of the ferrules was also a little too thick to fit inside the stops, so I ground it down with a rotary tool. Finally, the tops of the ferrules protruded above the cable stops and required trimming. For these reasons, the Shimano ferrules obviously weren’t ideal and there are probably better options.
I used 1/8″ nylon tubing to guide the cables around the bend where the top tube and down tube meet inside the frame. The tubing is super low friction, durable and light. I cut two sections of tubing that were just long enough to clear the bend. I inserted the ferrule into the stop and superglued the tubing around the nose. This formed a secure bond to hold the tubing in place inside the frame.
 |
| Improvised cable stops/guides |
I think that this method is preferable to running full length cable liner (TriRig’s solution) or housing inside the frame. First, the short length of tubing reduces cable drag which can cause poor shifting. Second, it is a lot lighter than full length housing. Third, the tubing is thicker and probably tougher than cable liner, limiting the risk of the cable sawing into the carbon. I will still remove and inspect the guides at the end of the season since they will eventually require replacement.
Update: The cable guides do not show any wear after several months of hard riding. They should last for a few seasons.
3. Mark the holes.
TriRig and others arranged the two holes for the cable stops/guides in a line along the top tube, as opposed to side by side which would probably weaken the frame more. The key is to make sure that the first hole isn’t too close to the steerer tube, the holes aren’t too close together and the second hole isn’t too far back. The second hole should be positioned so that the cable travels straight down or slightly backwards to reach the bend, and it shouldn’t be too close to the brake cable port. I laid a strip of masking tape along the top tube (to help prevent paint chipping and carbon fraying) and marked the position of the two holes.
 |
| Start with a small bit and work up to the right size. It’s a good idea to cover the headset to prevent contamination. |
At this point, I recommend pausing, perhaps having a snack and a nap, and re-assessing your work only when you feel refreshed and sharp. Irreversible modifications to expensive frames and parts should only be undertaken with the utmost composure, sobriety and alertness. I’ve learned this the hard way. Once you reach the point of no return, a good policy is to measure twice, contemplate, consult a friend, take a rest, repeat a few times, and finally drill/cut once.
4. Drill!
Starting with my smallest drill bit, I carefully drilled two pilot holes. I gradually enlarged the holes, going up one bit size at a time. As I approached the diameter of the cable stops, I checked each time to see if the stop would fit. Eventually, a 5/16″ bit allowed the stop to slide in, but the hole was slightly bigger than was needed resulting in a tiny bit of play when the stop was inserted. There could be a metric or non-standard bit size that yields a tighter fit.

5. Insert the cable stops/guides.
To remove play in the cable stops, I wound PTFE/Teflon tape around the stops. The tape forms a thin sleeve that secures them in place and prevents vibration and rubbing that could wear down the carbon over time. It also helps prevent water sweat, sports drink and tears from entering the frame.

6. Re-cable.
Surprisingly, this was the most finicky step, but it was no more annoying than with the original cable routing. I’ve tried finesse, but I usually resort to repeatedly ramming the cable in and out of the port until it pops out the hole at the bottom bracket. Sometimes it takes one try, sometimes it takes 101 tries, with a corresponding amount of profanity.
One trick for re-cabling is to remove the cable guide under the bottom bracket. It’s also a good idea to put a drop of superglue on the cable end to prevent fraying. Next time you re-cable your bike, it’s a huge time saver to first feed a length of housing or tubing along the old cable inside the frame and out both ends. This way the housing/tubing acts as a temporary guide when you insert the new cable. Once I set up the derailleurs, shifting proved to be just as crisp as before.

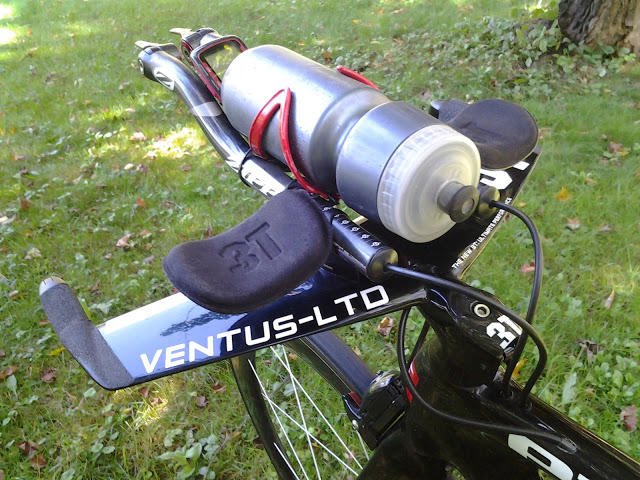
7. Bonus step for 3T Ventus users.
The last step for me was to “kamm tail” my 3T Ventus. If you want to run this bar without a dorkstack of spacers on a bike with behind-the-stem cable routing, then you’ll probably need to chop the tail off the airfoil to avoid cable interference. I put some masking tape on the outside of the bar to prevent paint chipping along the cut. There are actually two lines inside the fairing just behind the clamping bolt. Using these lines as a guide, a hacksaw with a 32 TPI blade made short work of the aluminum. Next, I used a rotary tool with a silicon carbide grinding wheel to smooth all of the sharp edges. The bare aluminum along the cut was an eyesore, so I touched it up with a black permanent marker. As a closet weight weenie, I was really happy to drop like 10 grams!
Add an aero front brake and you’ve got a “budget” superbike!
 |
| The TriRig Omega front brake is super low profile. |
 |
| Straight extensions sure look badass, but I’ve since swapped them for more ergonomic Zipp VukaShift s-bends. |
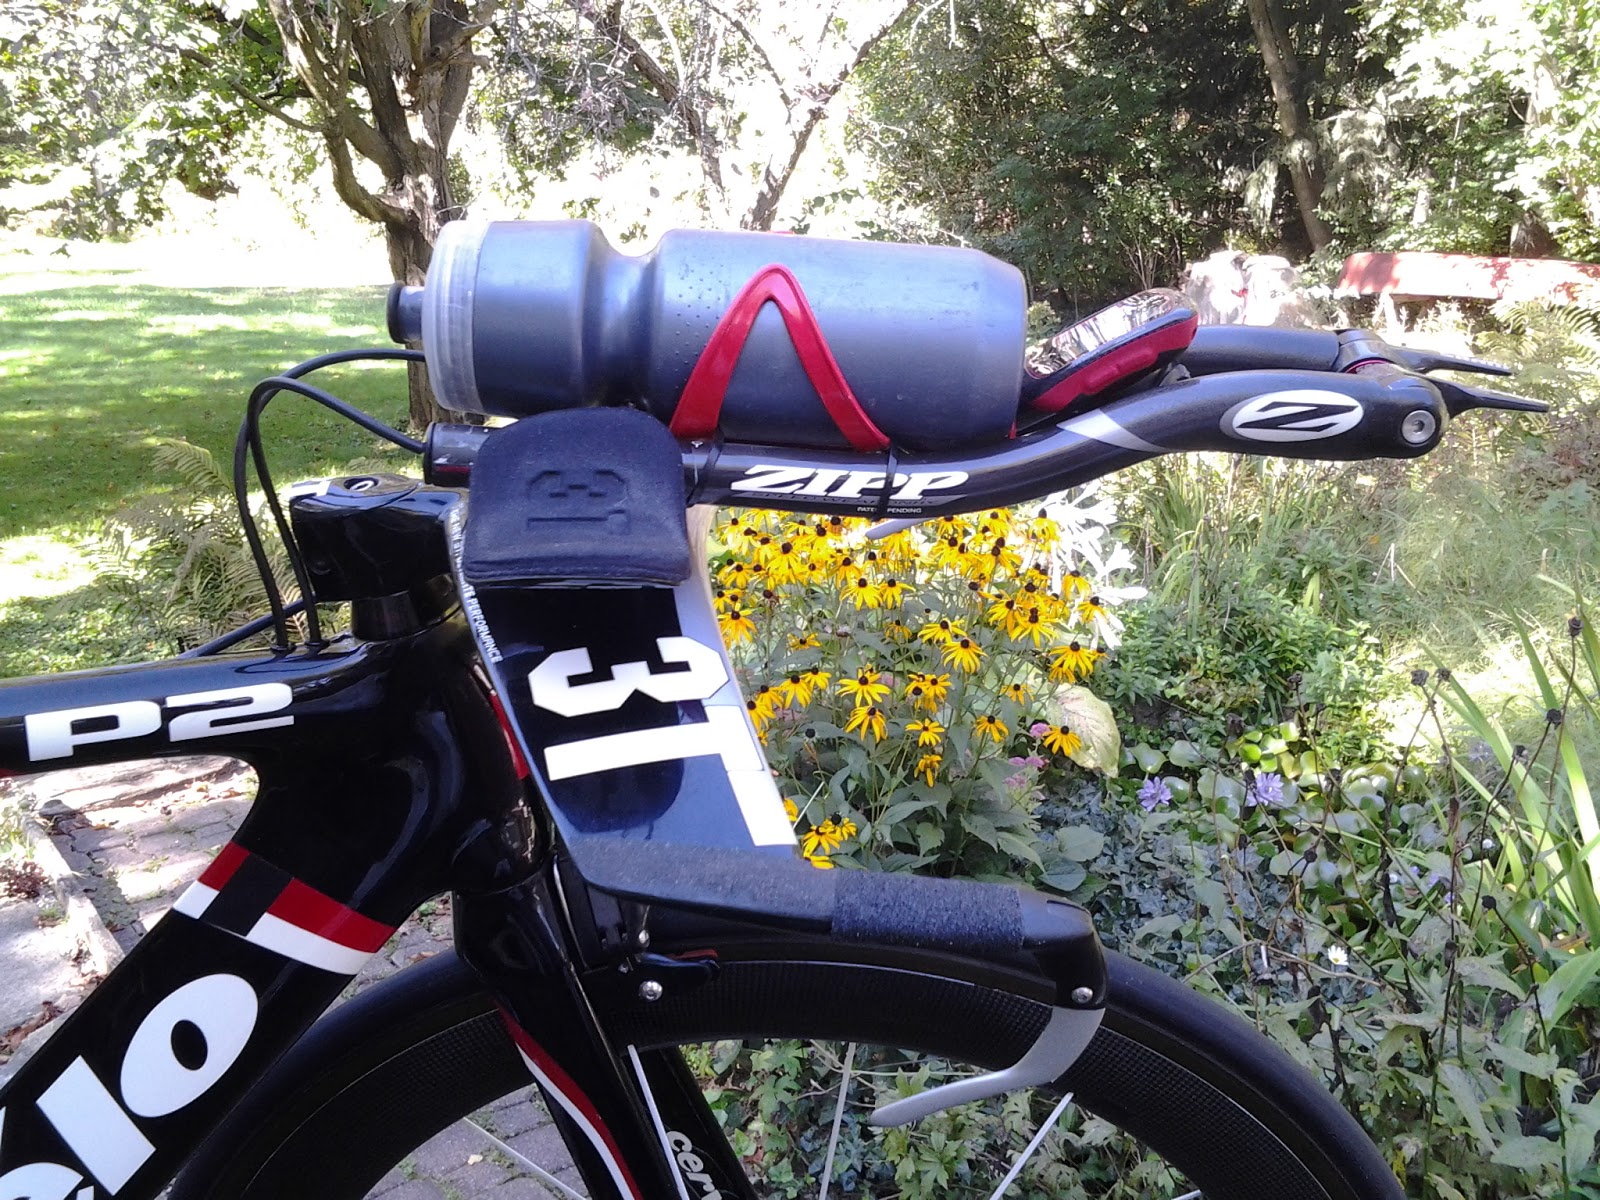 |
| Skateboard/anti-slip tape provides secure grip for the minimal 3T Ventus pursuit position. It’s also lower profile than regular bar tape. |
Questions? Ask away in the comments below!